

Thinking about painting your hardwood floors white, but not sure how? I’m sharing everything you need to know to create your own DIY white wood floors in the post below.

Painting hardwood floors white
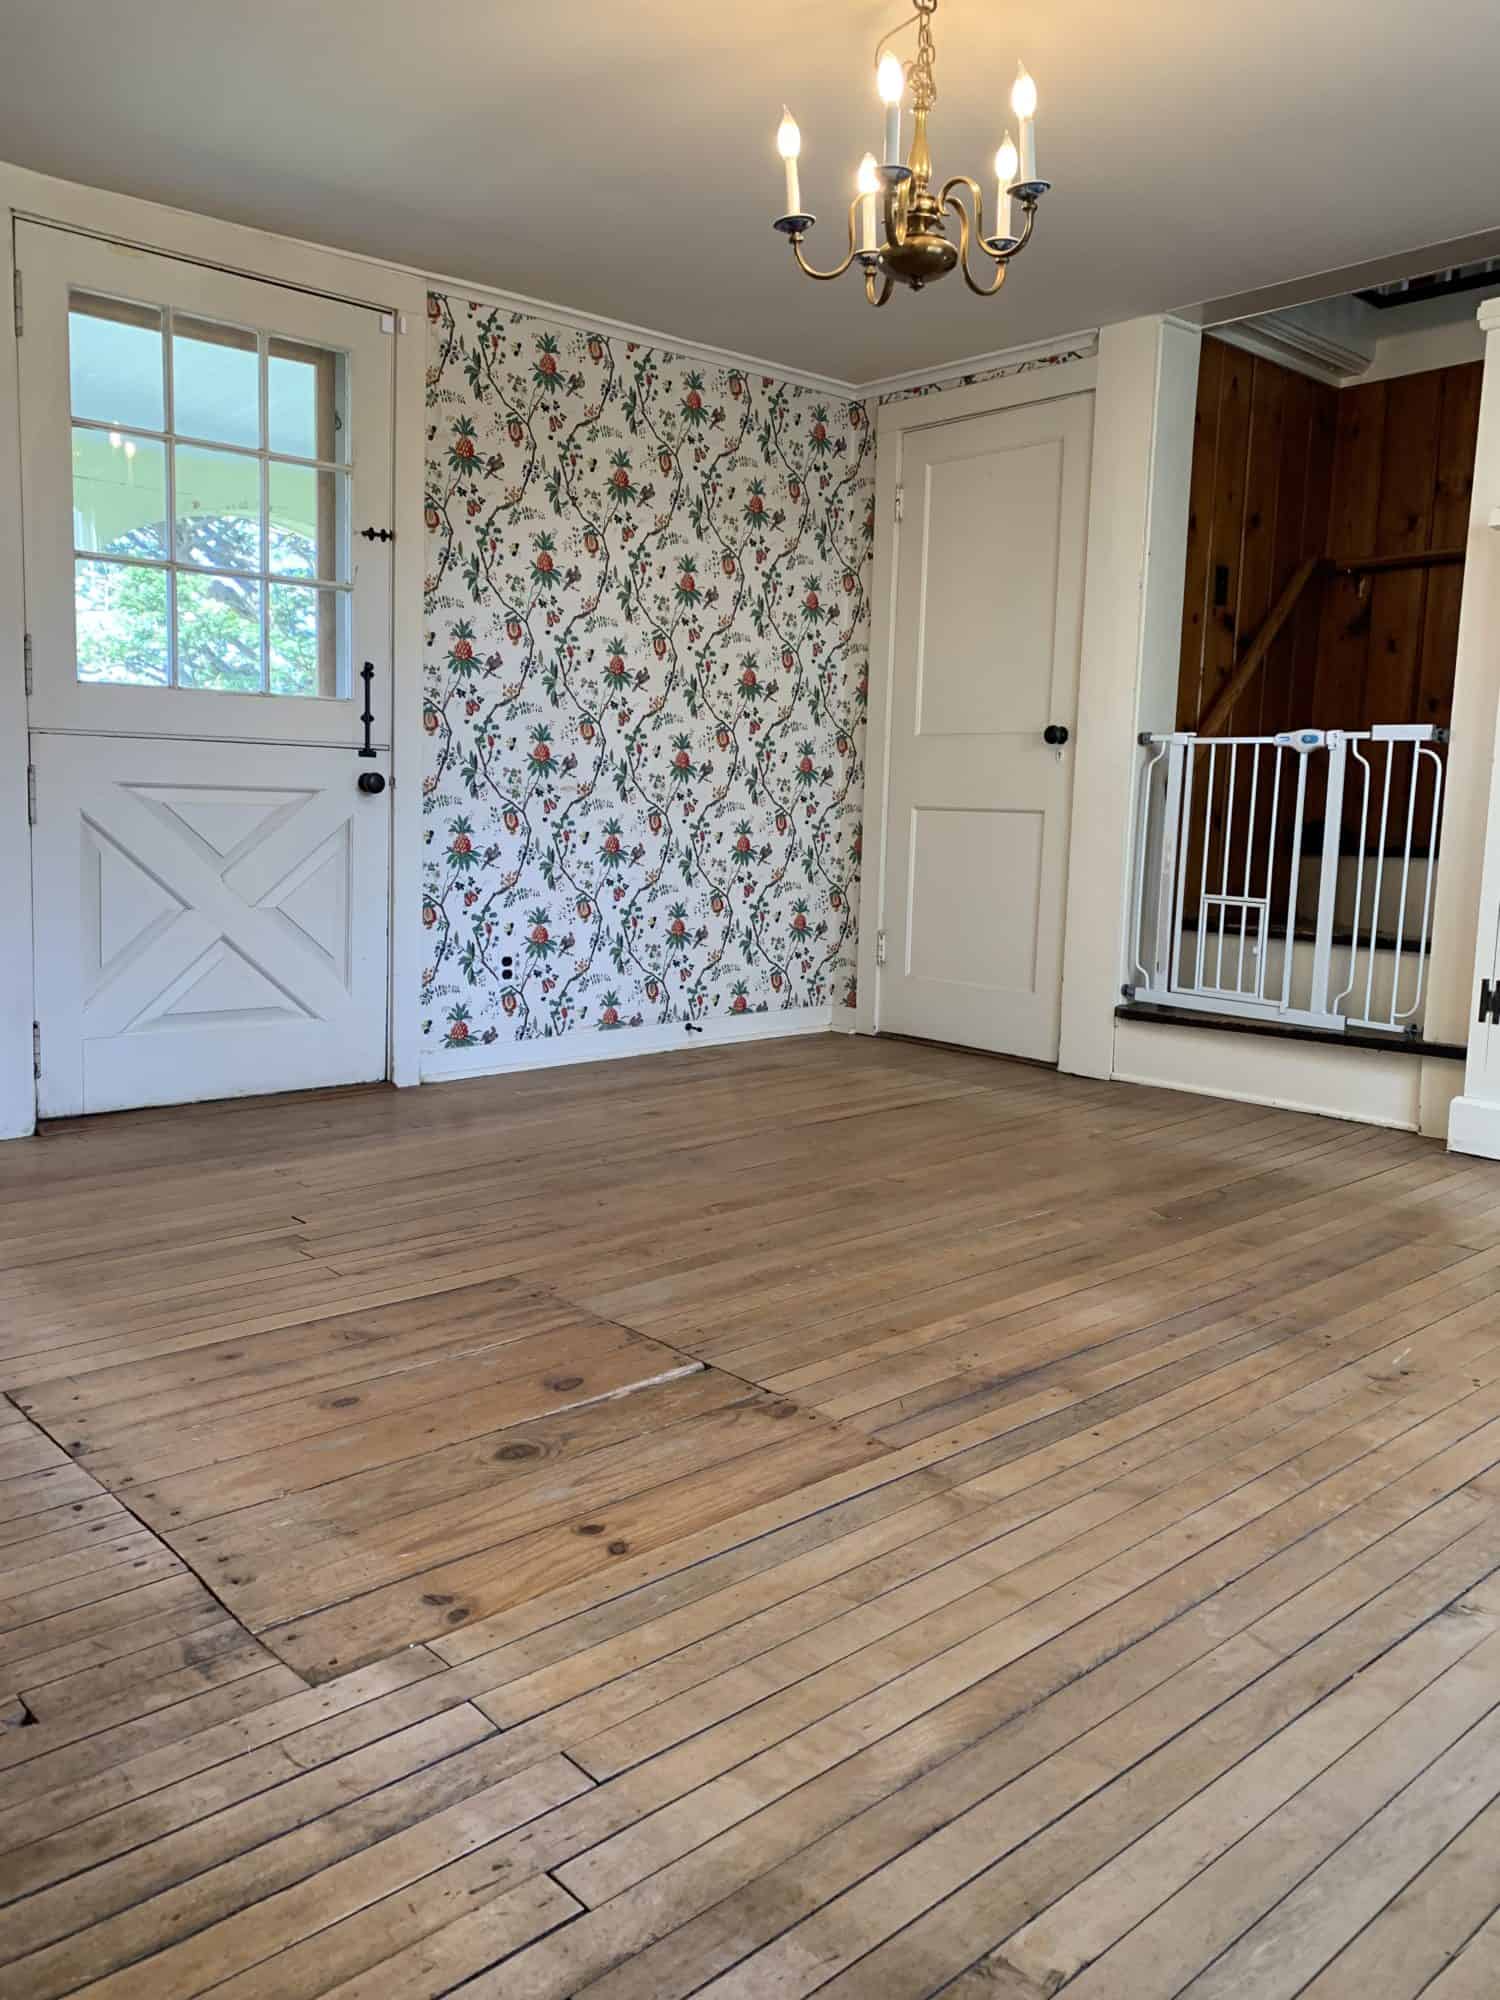
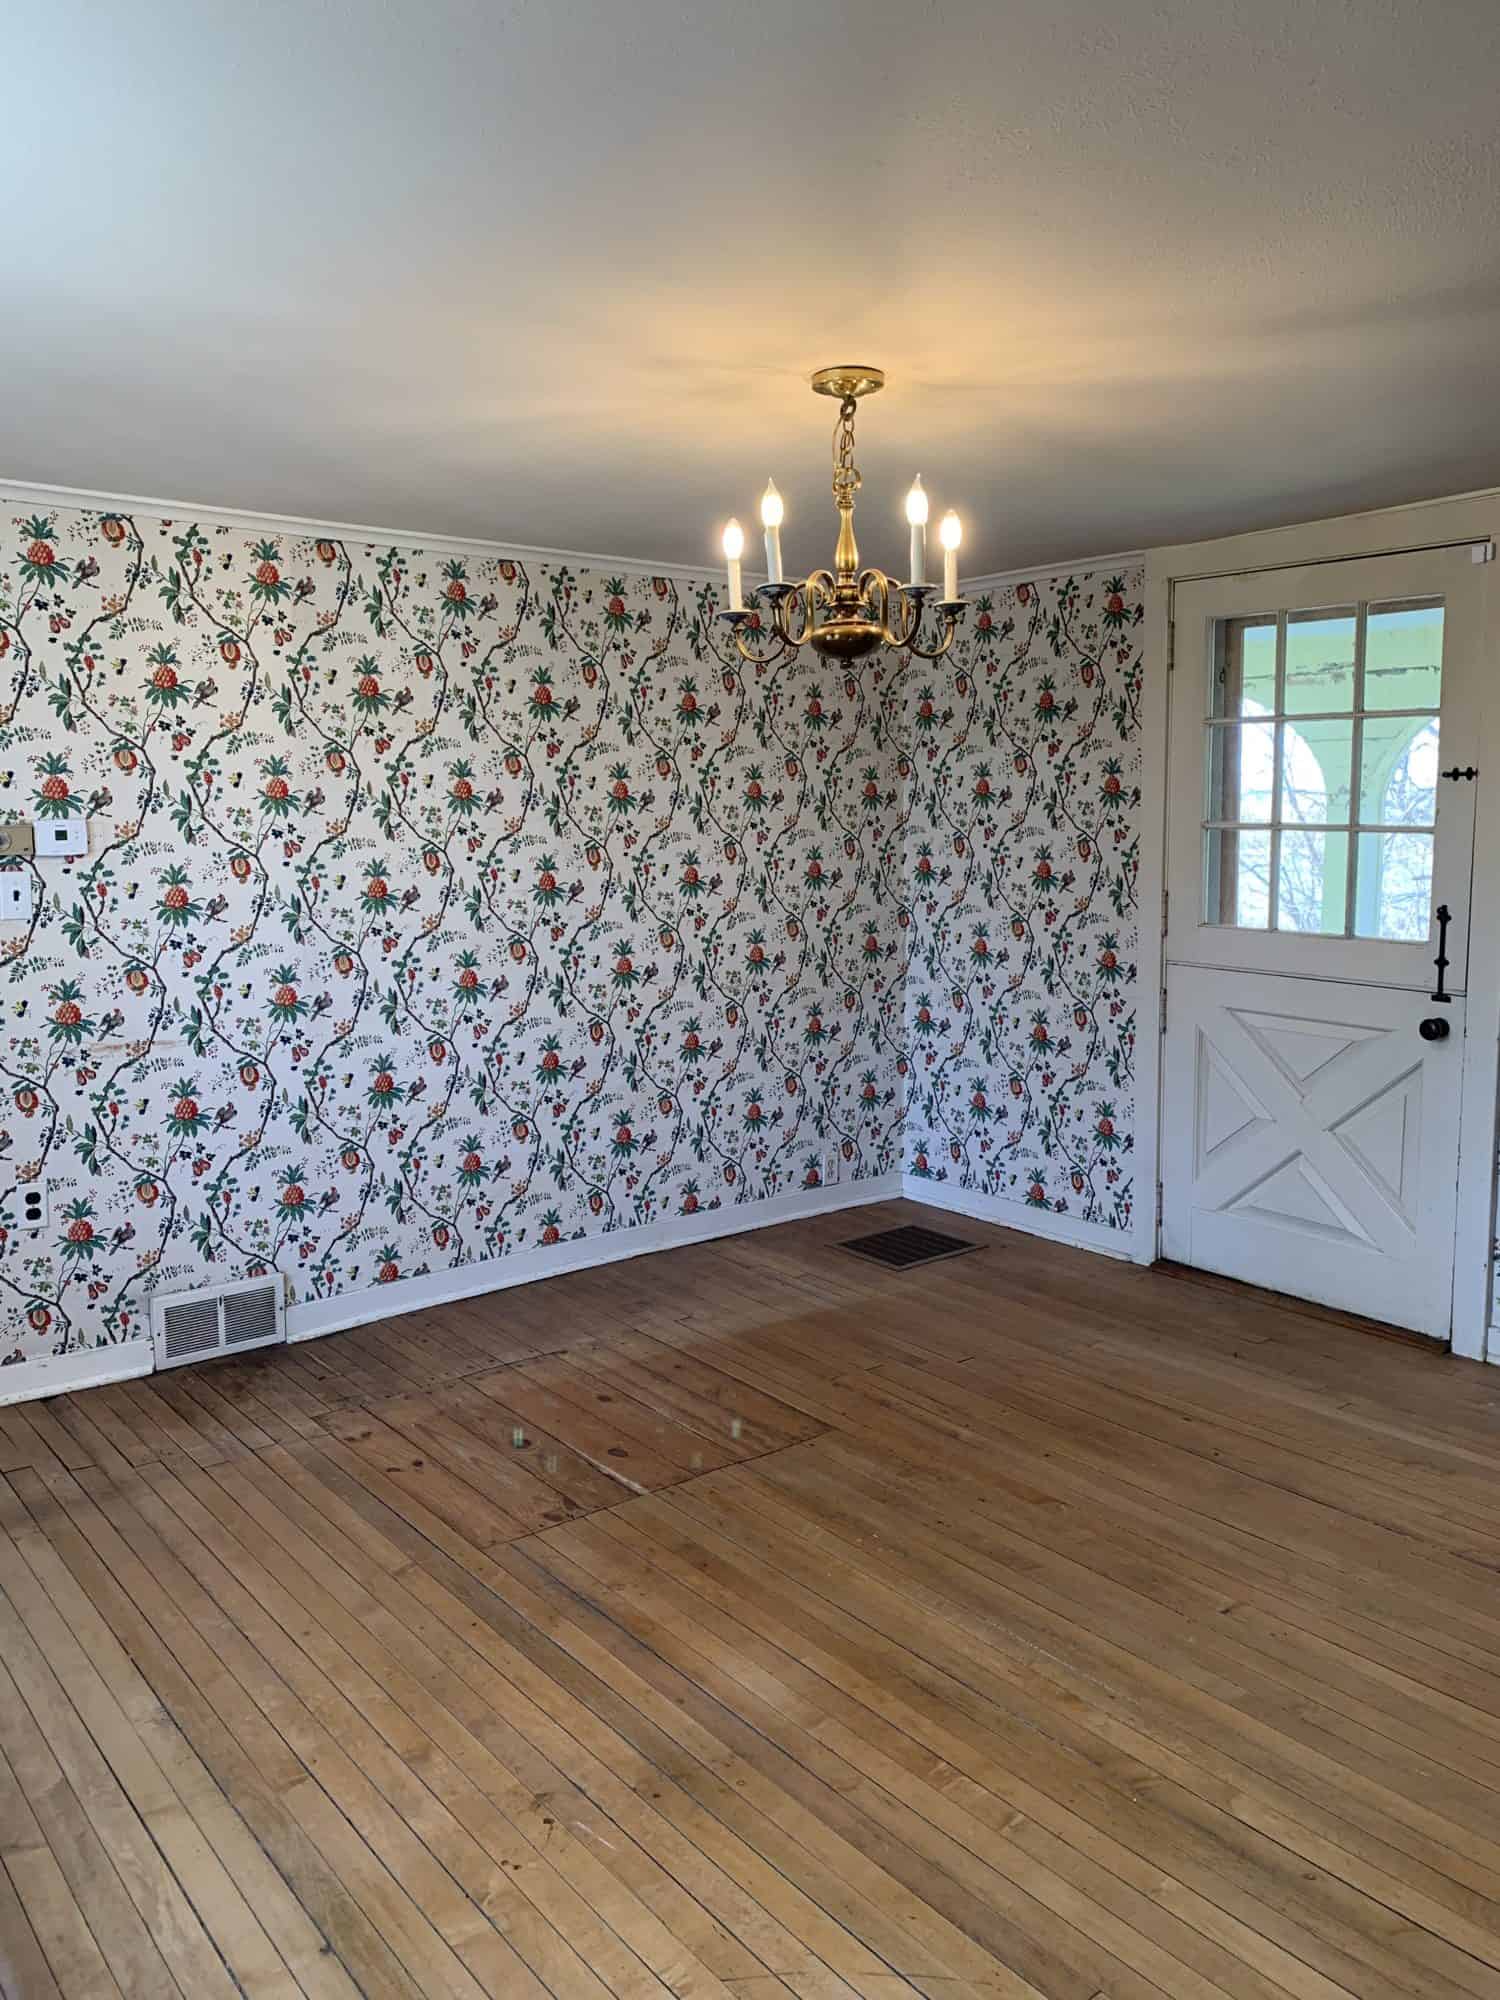
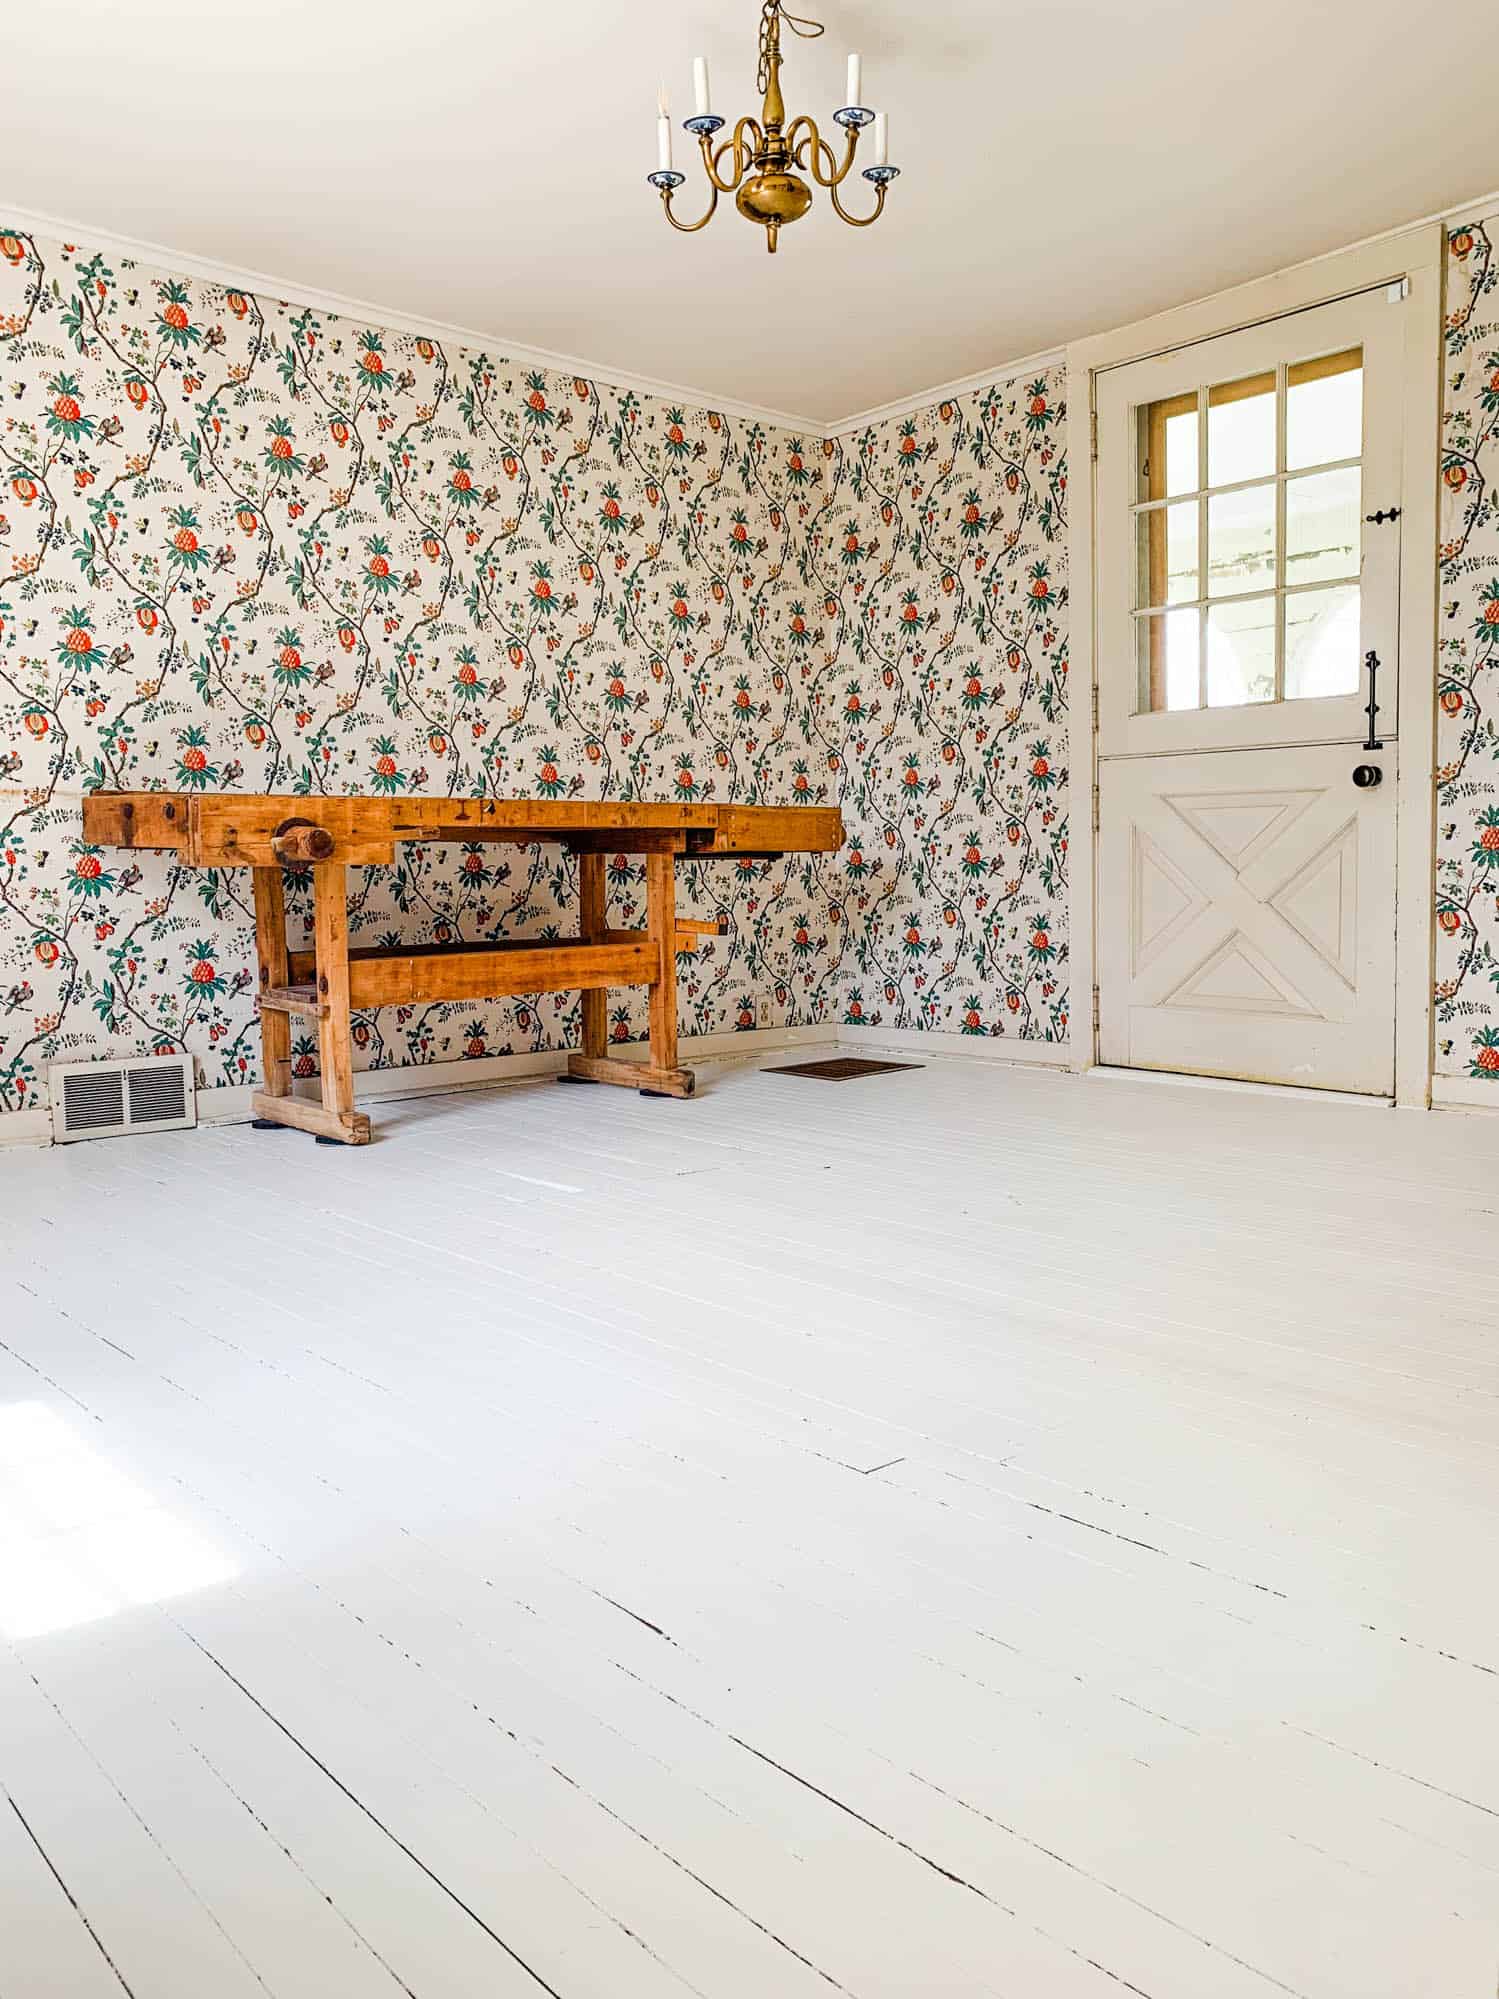
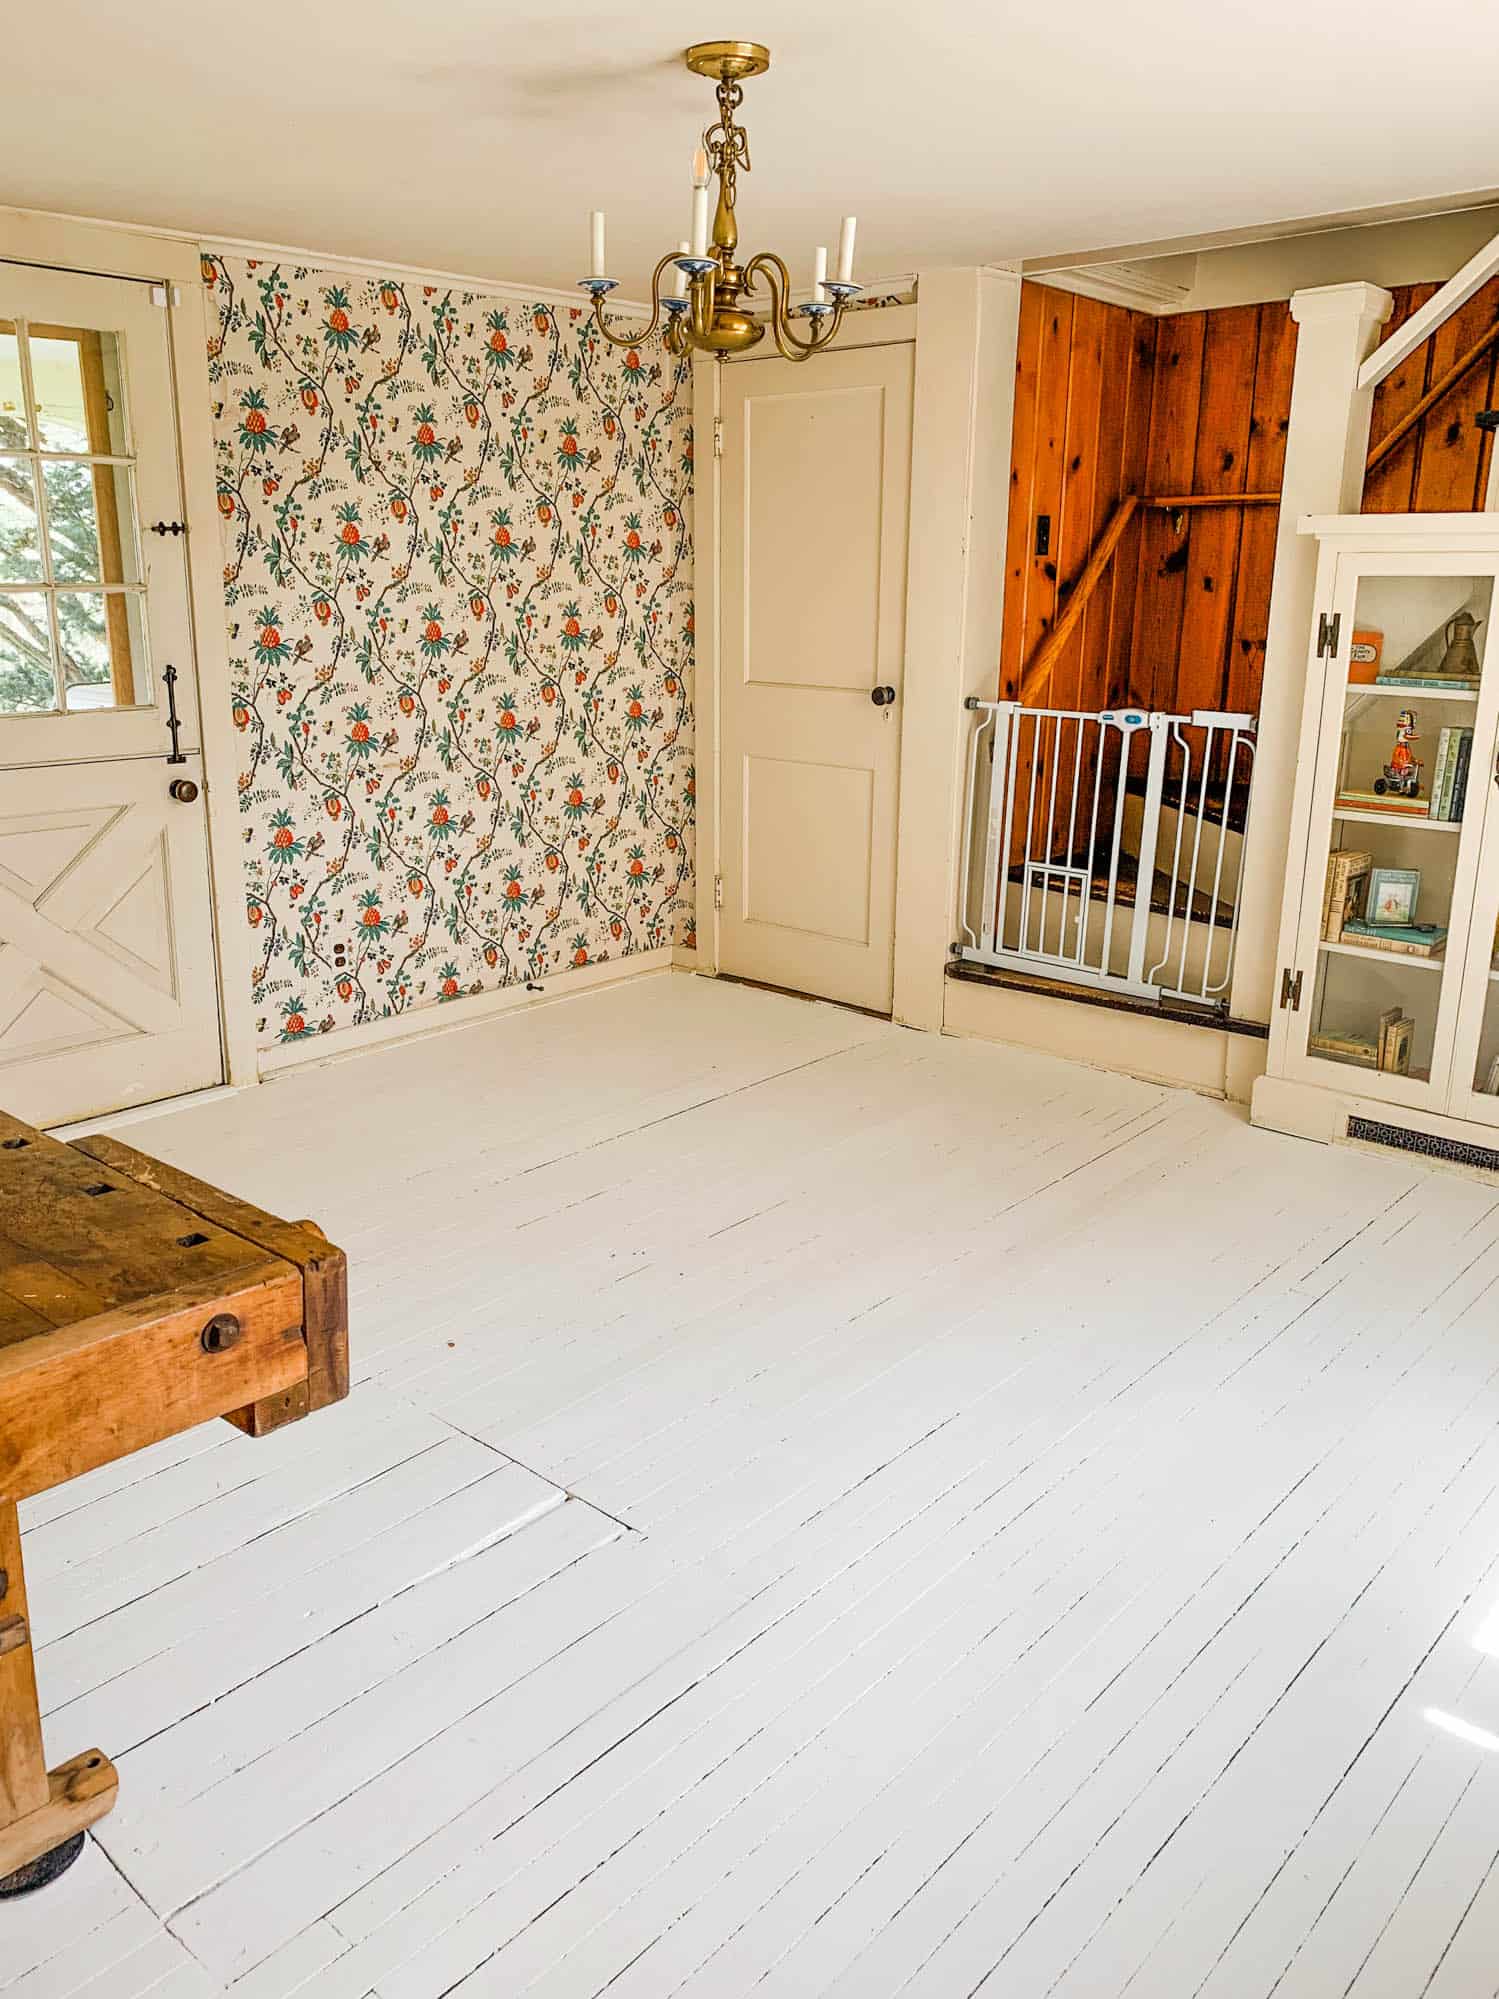
Before going too far into our DIY white wood floors, let me start off by explaining why we decided to paint our floors in the first place. Purchasing an 1800s farmhouse inevitably comes with a whole lot of work (and character!) Although we loved the existing hardwood floors, they were ROUGH. Huge gaps between boards and exposed nail heads were everywhere, along with zero finish on the boards. Their poor condition made it impossible to refinish them. Our only options without replacing were 1) leave them as is or 2) paint them. We love the look of white floors, so we decided to start painting our hardwood floors white.
DIY white hardwood floors
Before you dive in and start painting your hardwood floors white, it’s a good idea to consider whether or not your floors are a good candidate for painting. If your hardwood floors are in poor condition and they are unable to be sanded/refinished, then painting is a good option. The more gaps between floor panels, the better! Gaps simply lead to floors with more character.
However, if your floors are newer and in good condition, then consider getting your floors professionally refinished rather than painting them. If you simply paint your new-ish hardwood floors white, then the end result will look like a white blob without character.
If you have your heart set on white floors, but now you’re realizing that your floors are not a good candidate for painting, then consider getting them refinished with Bona NordicSeal (in white), which allows you to customize how white you want the floors to look, while still maintaining the integrity of your current hardwood floors. We plan to pursue this option in the areas of our house with newer flooring. (Unfortunately, this option is best completed by a professional and is significantly more expensive than painting your hardwood floors white.)
What you need
- Pole sander head, sand paper + extension pole)
- Paint tray liner
- Painters tape
- Roller covers
- Roller frame
- Paint brush (if needed for cutting in trim)
- Primer
- Paint
Step 1: Prep
After completely clearing the room of all furniture, use painters tape to protect the trim and doors from paint splashes. With a pole sander using 80-100 grit sanding paper, sand existing flooring. Be sure to remove any gloss from the existing finish.
Step 2: Prime
Next step for painting your hardwood floors white is priming. Depending on the current condition and color of your hardwood floors, you may need to do multiple coats of primer in order to ensure that the wood stain does not show through when you start painting. Be sure to follow directions on your paint primer can regarding how much time to wait in between coats. (For reference, we did 2 coats of primer.)
Step 3: Paint
Once your primer fully dries according to the directions on the paint primer can, it’s time to start painting! We used Benjamin Moore “Cloud White” on our DIY white hardwood floors. It’s the perfect white that isn’t too stark but also not too creamy.
We personally did 2 coats of paint on our hardwood floors, but the amount of coats will vary depending on your specific floors. As always, be sure to follow the directions on the paint can regarding how much time to wait in between coats, and wait the appropriate amount of time before moving furniture or rugs back into the space.
The verdict
And that’s it! I’m absolutely in love with how our DIY white hardwood floors turned out. We have a few minor spots that chipped due to kids dragging chairs, but those areas are now covered with a rug and can be touched up later.
Before painting your hardwood floors white, consider yourself warned. White floors literally show EVERYTHING, from dog hair to dried water droplets. I have a minor obsession with vacuuming and mopping our floors, so this doesn’t bother me. However, if you hate cleaning your floors, then I would highly recommend that you refinish your floors in a more forgiving stain instead of painting them white.
Next step for this room? Swap out the light fixture, remove wallpaper, and repaint trim. Stay tuned!